>

3.17.2011

Camera strap slipcover

I've been seeing these super cute camera strap slipcovers all over blogland, and have wanted to try it out forever. My sister-in-law happened to have a birthday yesterday and it seemed like the perfect excuse to give it a try....so I did!:)

I'd love to post the tutorial, but I used someones to make this, and frankly, they did a great job! So, check out Angie over at nusery rythmes and sweet times for her camera strap tutorial, it's great!


I'm not the greatest seamstress, even though I pretend to be sometimes. But it's a simple gift, that I think may be going to most of my family and friends this year, gotta make all those girls and their camera straps stylish!

3.15.2011

The Relief Society party

In the LDS church (aka Mormons) We celebrate the founding of our Womens organization, the Relief Society, every March. This is the second year I've got to help put together this little birthday party, and it is SOO much fun! It's alot of work, but totally worth it!

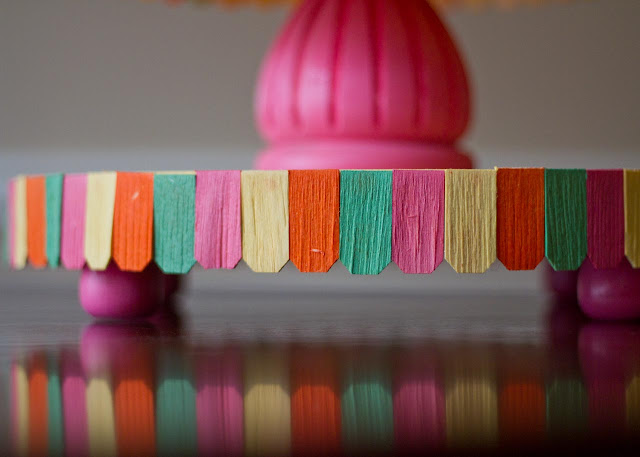
As usual, I made way more work or myself than I needed to, and made two cupcake stands. If you want all the directions on how I did this, go here.


I am loving these super cute and colorful cupcake stands, and they're WAY better covered in these gorgeous cupcakes that some of the other women made. (They tasted just as good as they looked too!)


Another one of the women made this beautiful picture as a centerpiece for our Hor d'oeuvre table. This was the theme for the evening, "Women of Worth". It was a beautiful celebration of the women in our ward.


I also made a fun pennant banner to hang behind the table, I love the extra color it added to the
beautiful (haha!) gym!:) I'm just glad it was way easier to make than I thought it would be!


Okay, lots of pictures of the cupcakes, and stand. What can I say, I love them!


The colors were all so bright and cheerful. It just made the evening more fun and it was so much fun to get to do all this with some truly incredible women!


The new Relief Society logo has "Faith. Family. Relief" printed underneath it, so we used that throughout the room too. This is truly what this organization is all about. What could be better than those three things?


It was a super fun evening, and I got to spend it with some of my favorite people, including my mom who happened to be in town for just a couple days!

3.10.2011

Freebie Friday ~ Easter subway art

So, I'm jumping on the subway art bandwagon. I love some of them, and they make beautiful art for the holidays that easy to do, and oh so cute!!!

I haven't even had a chance to print it out and put it up, but I'm excited to use it with my new cupcake stands, they'll go together perfectly! I think I may see an easter party in the future!

So here's a little freebie for everyone to enjoy! Just click on the picture to take you to the download.

3.09.2011

DIY cupcake stands

Sometimes, I think I may be a little over-the-top. We have an activity coming up at church, a birthday party, and I wanted it to be FUN! So, I decided that I should make some super cute cupcake stands. Like I know how to do that! But I decided to give it a go anyway.


For christmas my awesome parents got me a super cool bladerunner. It's a saw, and I was so excited! I hadn't pulled it out yet, and decided that this was as good a chance as any to figure out how to use it.


Turns out, circles are a little hard to cut out. I am nowhere near perfect, but they're in the general circle shape, so that should be good enough, right? Hey, I'm a novice, ya get what ya pay for!:)


After the circles are cut out, and you've made a trip to Lowes for the other wood pieces, (which were not cheap by the way, and considering I made two cupcake stands, it added up!), get to work spray painting. You'll also need to pick up some wood dollhouse shingles at hobby lobby and divide them up into however many colors you want.


Once everything's dry, get to work with the glue gun. I probably could have used something even more permanant, but I figured this way it would be easy to take apart if I want to change the colors later.


I did use gorilla glue for the middle pieces and the feet though, you want those to be nice and sturdy.


I was a little worried it would be too much color, and a little too festive, but I kinda love how they look!


I can't wait to see them all covered in cupcakes!

Bingory!

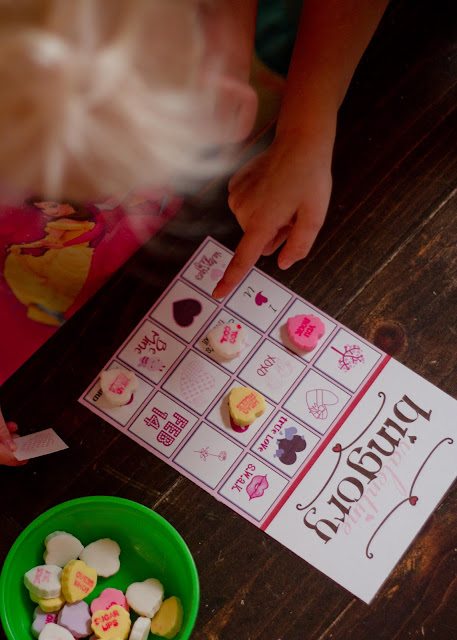
Ever heard of "BINGORY"? It's kind of a mix between bingo, and memory, and it's kinda fun for the kiddos. I had made some valentines bingory boards a few days ago, and thanks to the awesome weather we're having right now, we had lots of time to play.


I was going to print out the cards and the matching game pieces with a cute paper backing, and it would probably be good to laminate it too. But, we didn't have time to do that, the girls were getting fiesty, and mean, and driving me crazy! So, excuse the unfinished games!:)


Even Lexie got the hang of it, and had fun. She even won the first game!


Everything is more fun when there's candy involved too.


Please excuse the fact that we were all in our pajamas. We didn't leave the house today at all...you know, serious weather conditions. There was supposed to be snow, but all we got was ice...super fun for kids expecting to wake up to snow.


It's pretty simple to play. You cut out enough pieces to that you have one match for every piece on very kids game board. Does that make sense? If you have 4 kids playing, you'll need matching pieces for every one of their games. Then when they pick a card, they put a candy on the matching picture on their board. 
Simple as that, the first one to get four in a row wins!

 I only made 4 different boards, but the great thing about this game is that everyone could have the same board if you wanted them too. Because it all depends on what card they pick, it doesn't matter if their boards all match!

If you want to play bingory, go here for the free download!